
Kiro Power - Building a multi-agent, adaptive learning web app in an hour!
Transform from Kiro novice to power user with adaptive learning experiences.

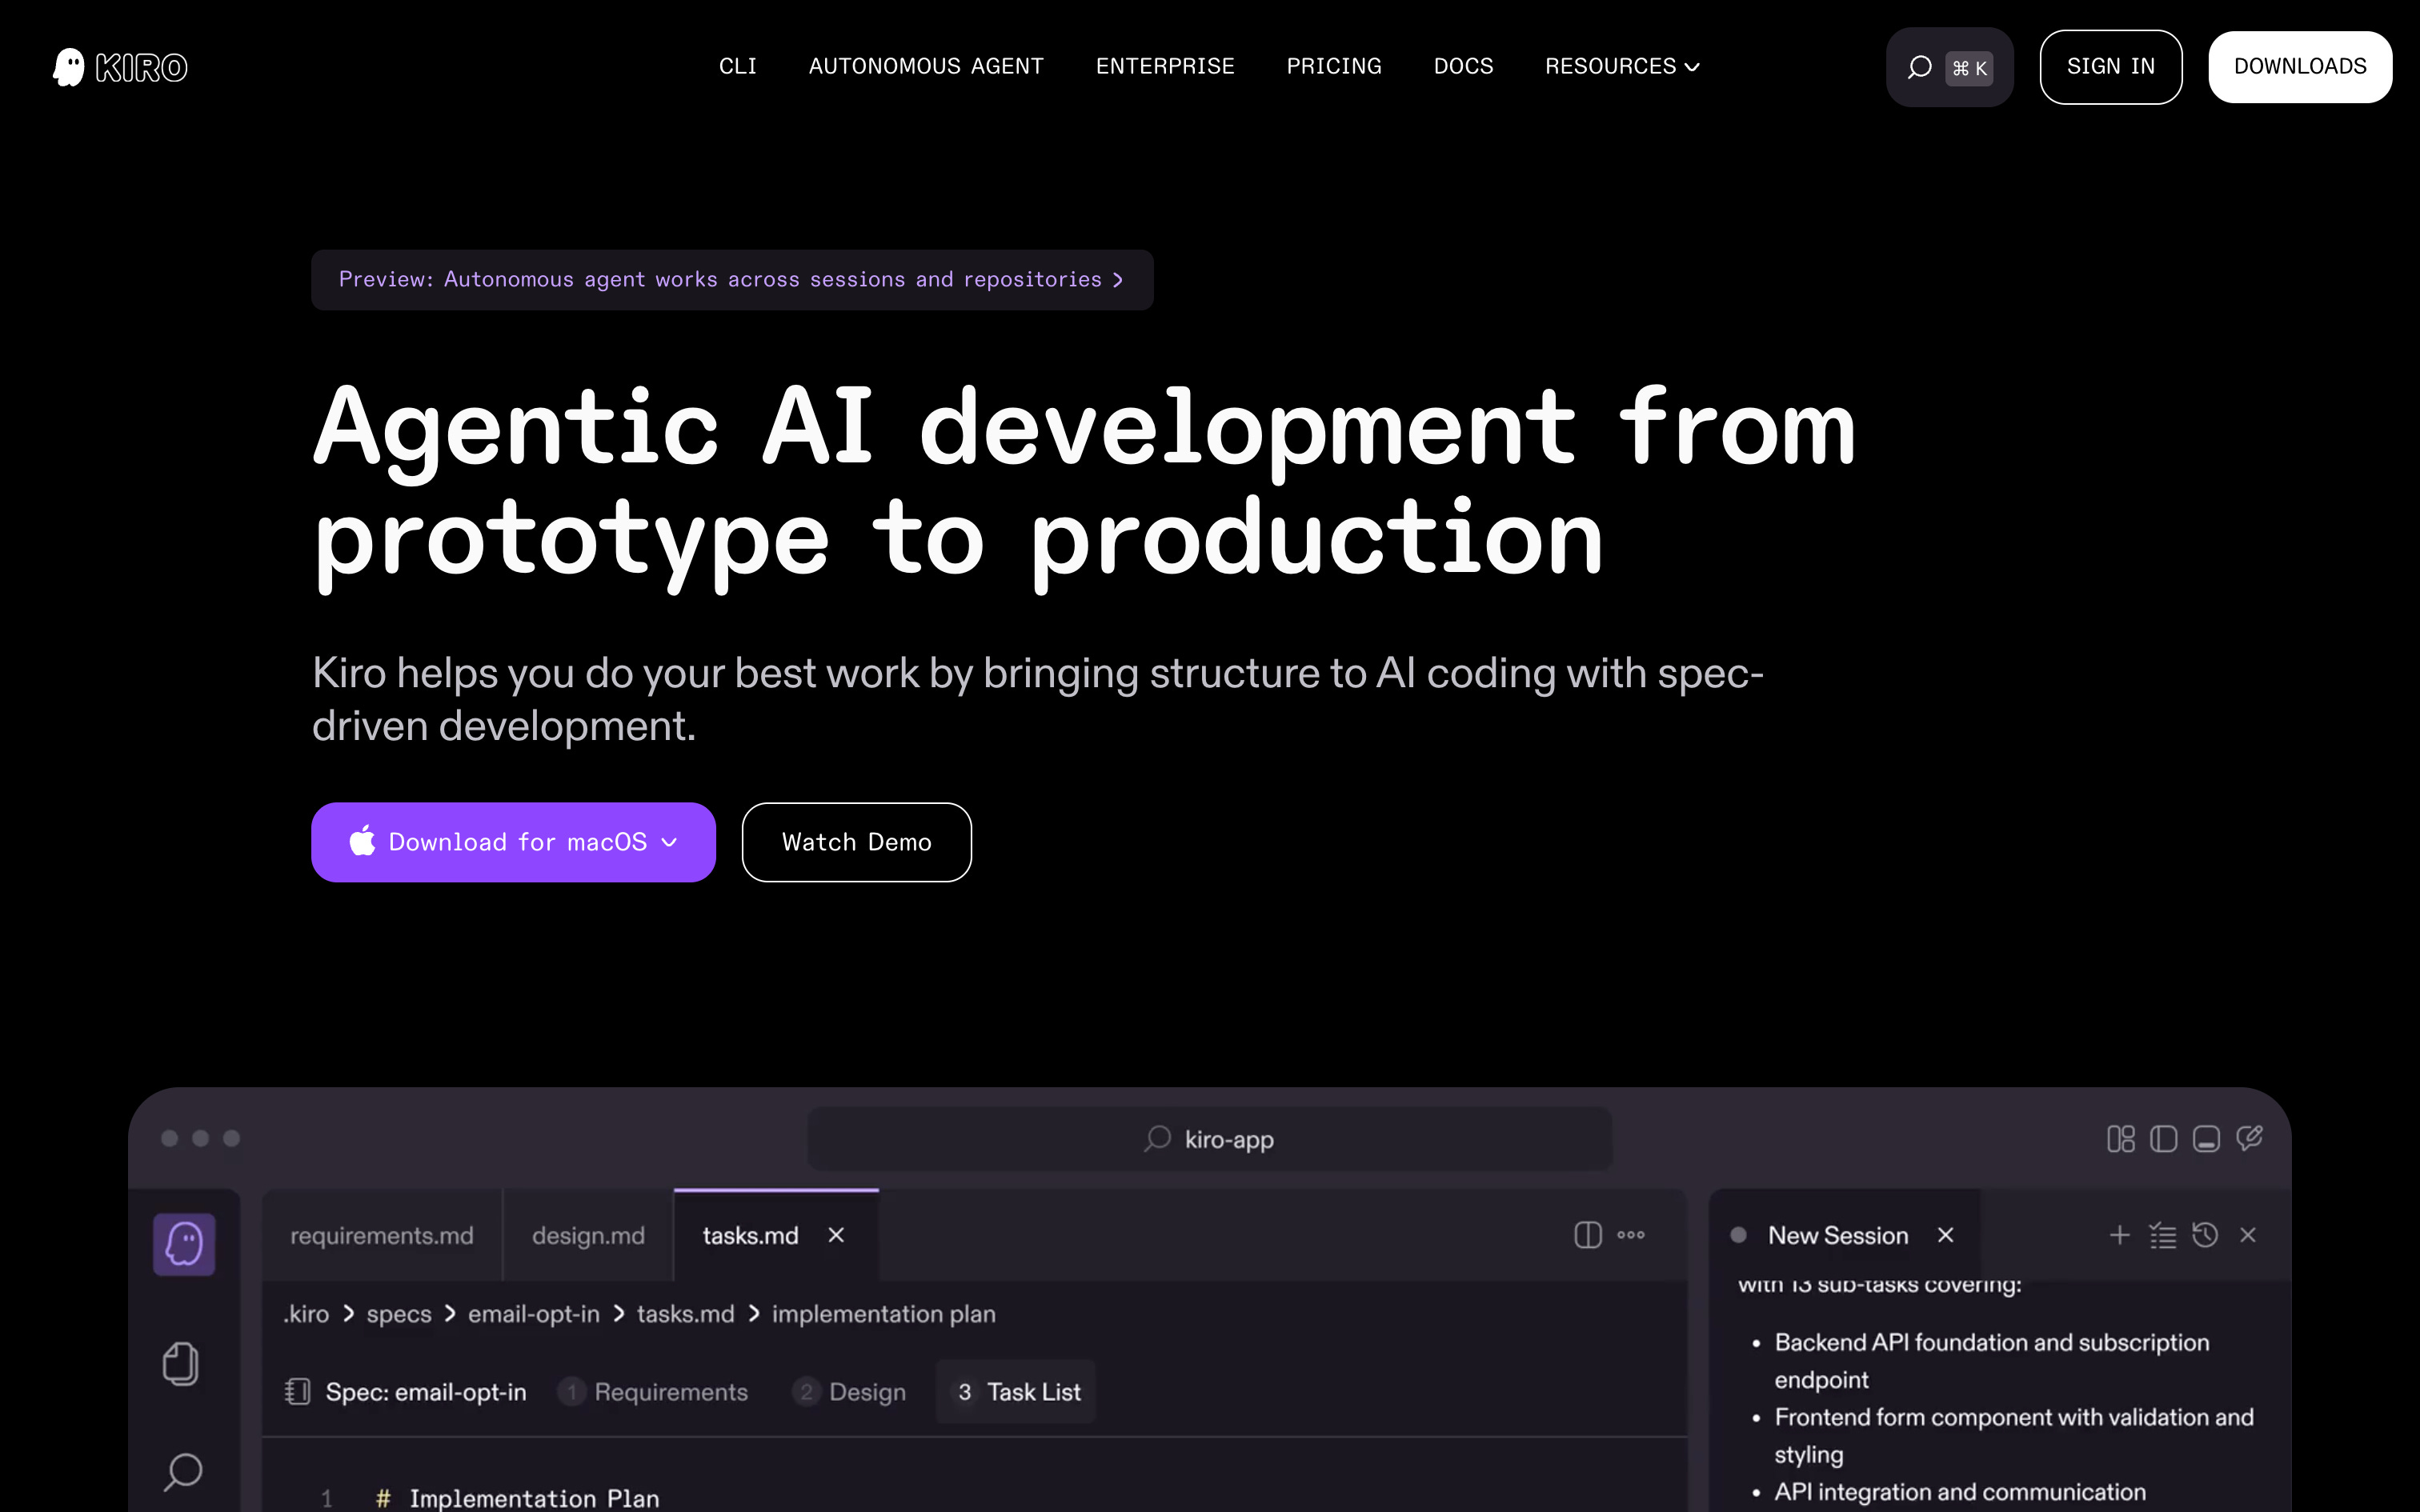
It is AWS Re:Invent time again. The largest, most awesome Cloud event on the planet! We have several exciting launch announcements planned this year. One of the most awesome AWS AI services includes Kiro which you can use for agentic AI development from prototype to production. And Kiro team just announced - Kiro autonomous agent - a frontier agent that works independently on development tasks, maintaining context and learning from every interaction.
So I am inspired to write another series of posts covering all things Kiro and more! Here goes the first one.
Getting Started
One of the challenges of getting started with a new code generation tool is literally how to get started. There are so many ways to setup the first project that new users are usually lost and fumble their way into trying different permutations.
Thankfully Kiro starts with two clear options:
Prompt your way into building software if your requirements are not clear
Requirements specifications based development which is a more structured approach
I chose option 2, but all I had was this simple prompt to start my journey to building Kiro Power in an hour! At least the first release of the MVP user experience.
So I begin the 60 minute clock with this minimalist yet ambitious product vision.
Kiro Power is a web app which enables first time Kiro users become power users in easiest, fastest, most productive way possible. It uses contemporary adaptive learning techniques, progressive disclosure user experience, latest online research for resources, and multi-agent capabilities to guide user step by step through every aspect of productively building with Kiro. One of the resources will include a walkthrough of how Kiro Power itself is built from scratch including starting with this prompt!
Requirements Generation
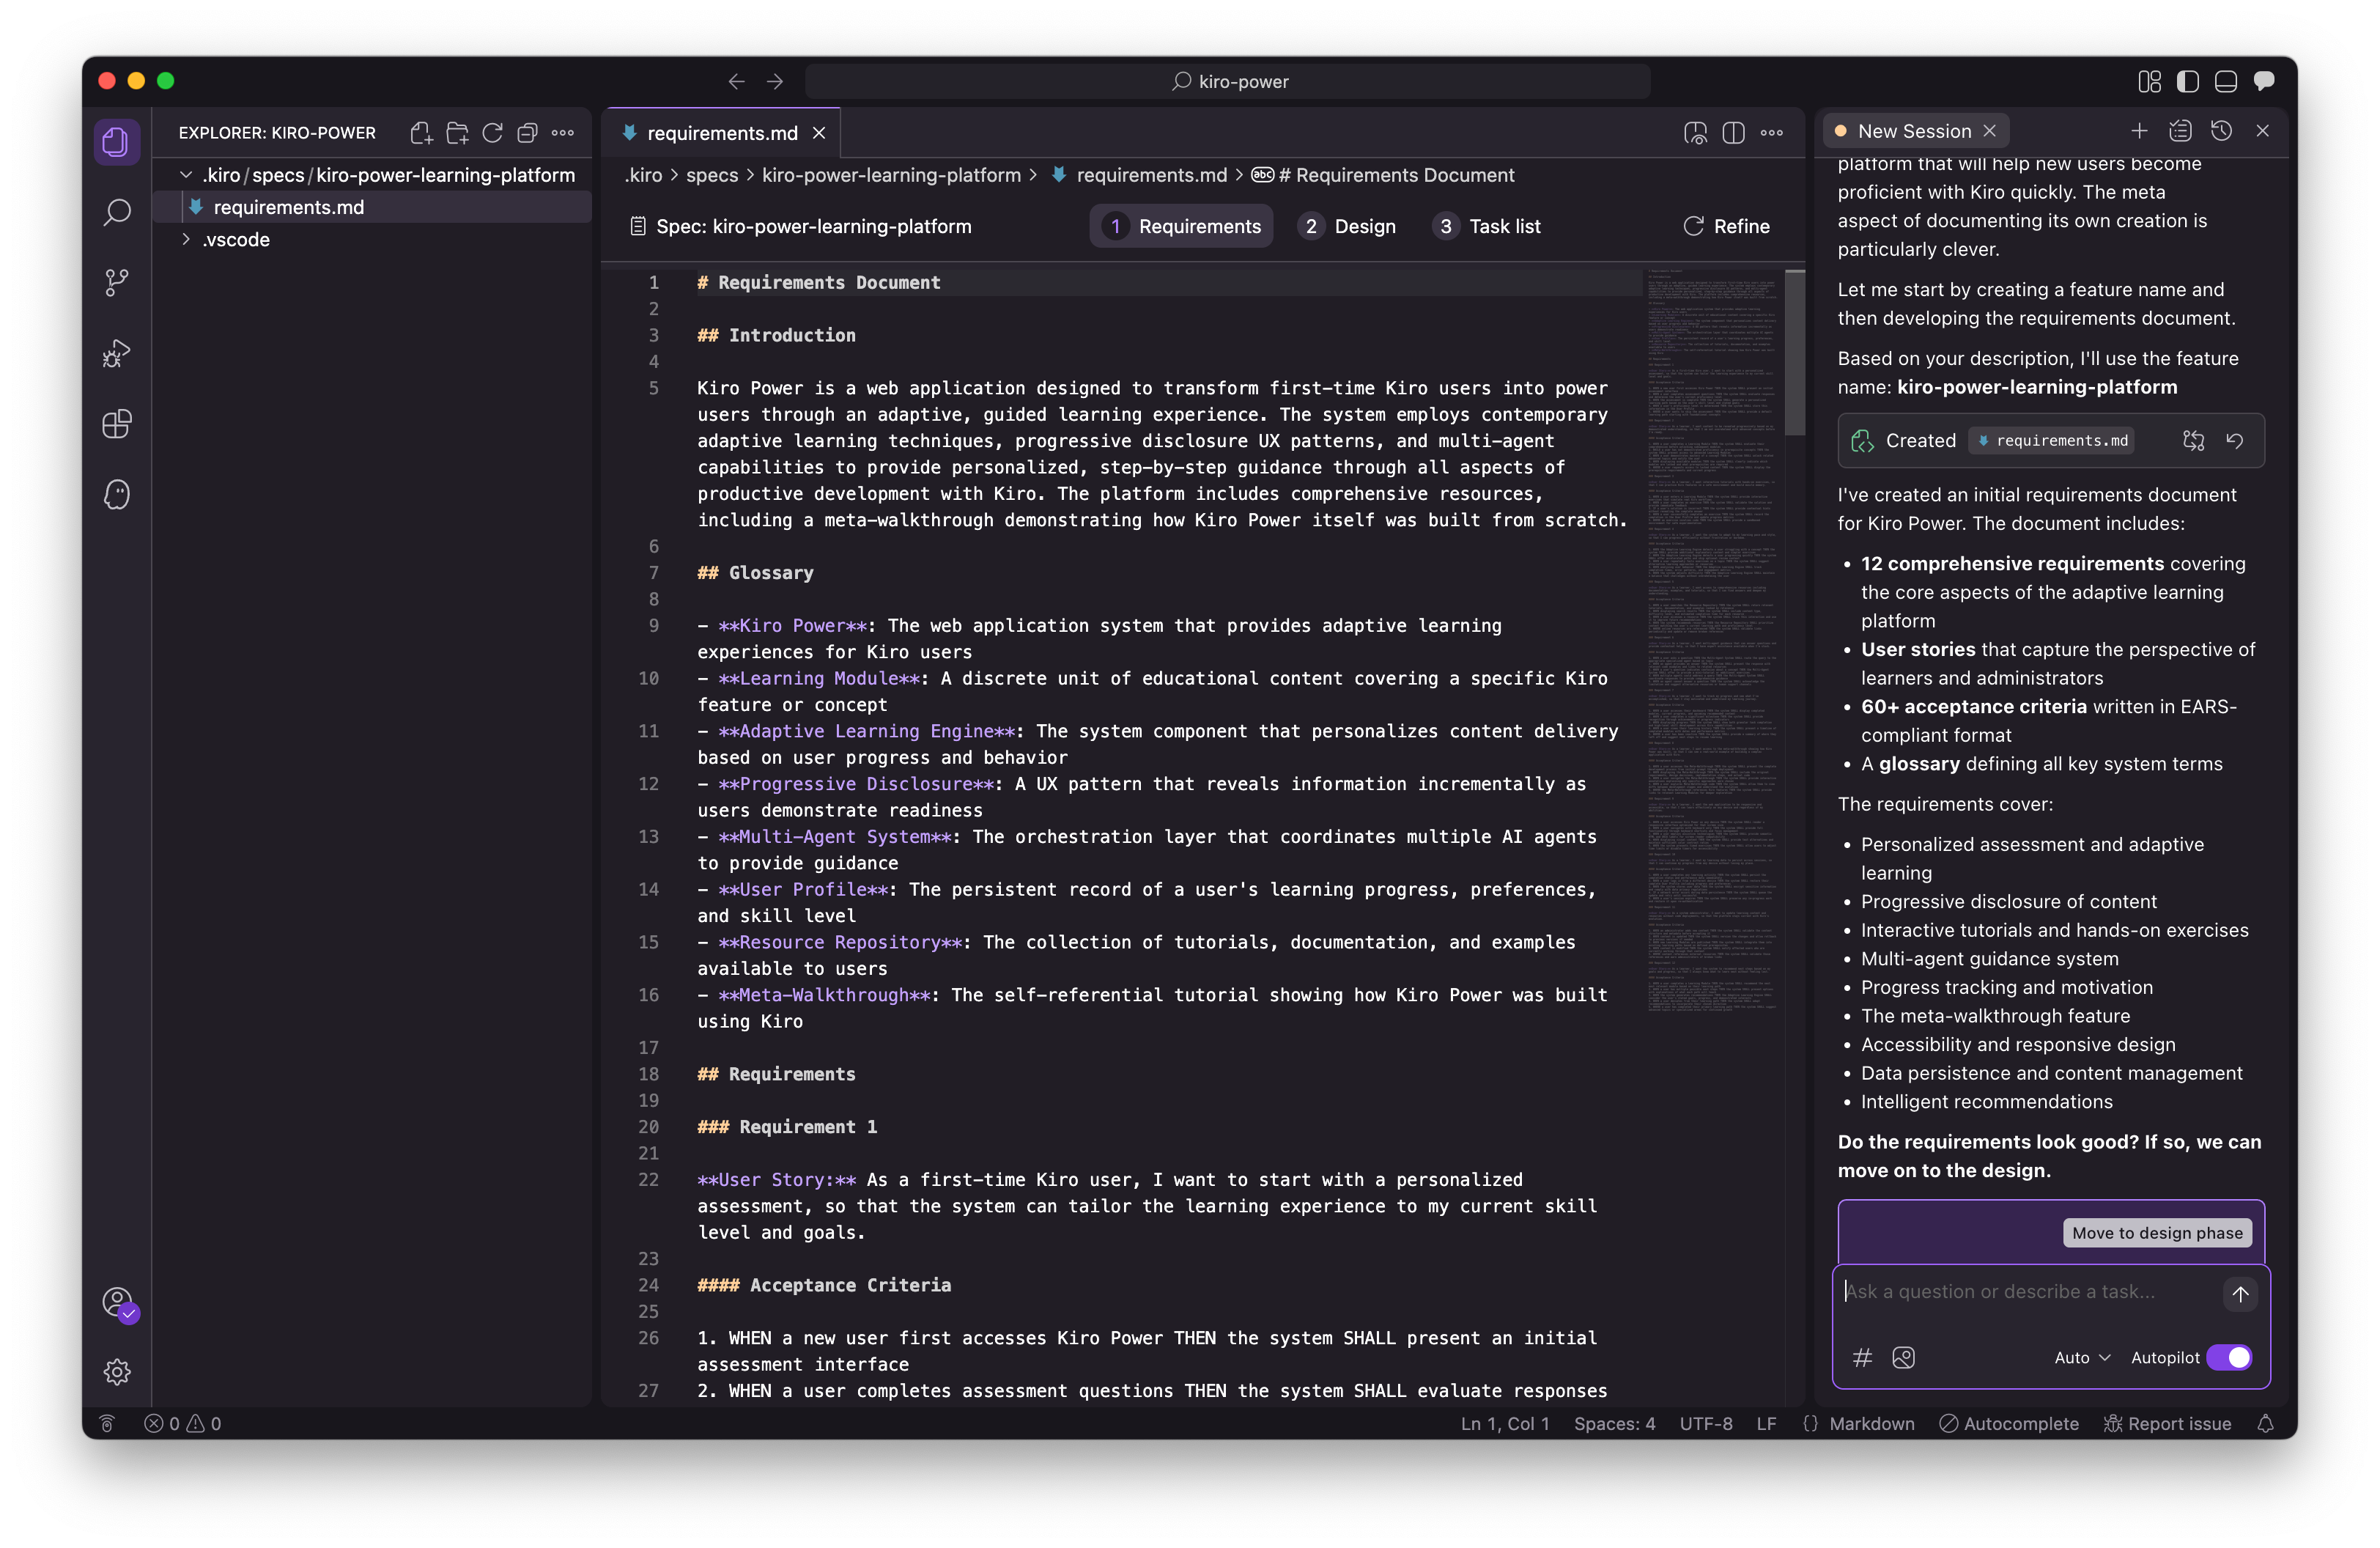
It took a minute for Kiro to generate a comprehensive requirements document including sections like Introduction, Glossary, and Requirements with Acceptance Criteria. The document elaborated 12 requirements. It seems the right balance between being too flaky vs too verbose. Just right definition of each requirement. Easy to grasp for human reviewer and opinionated enough to guide the AI along next step.
Design Specification
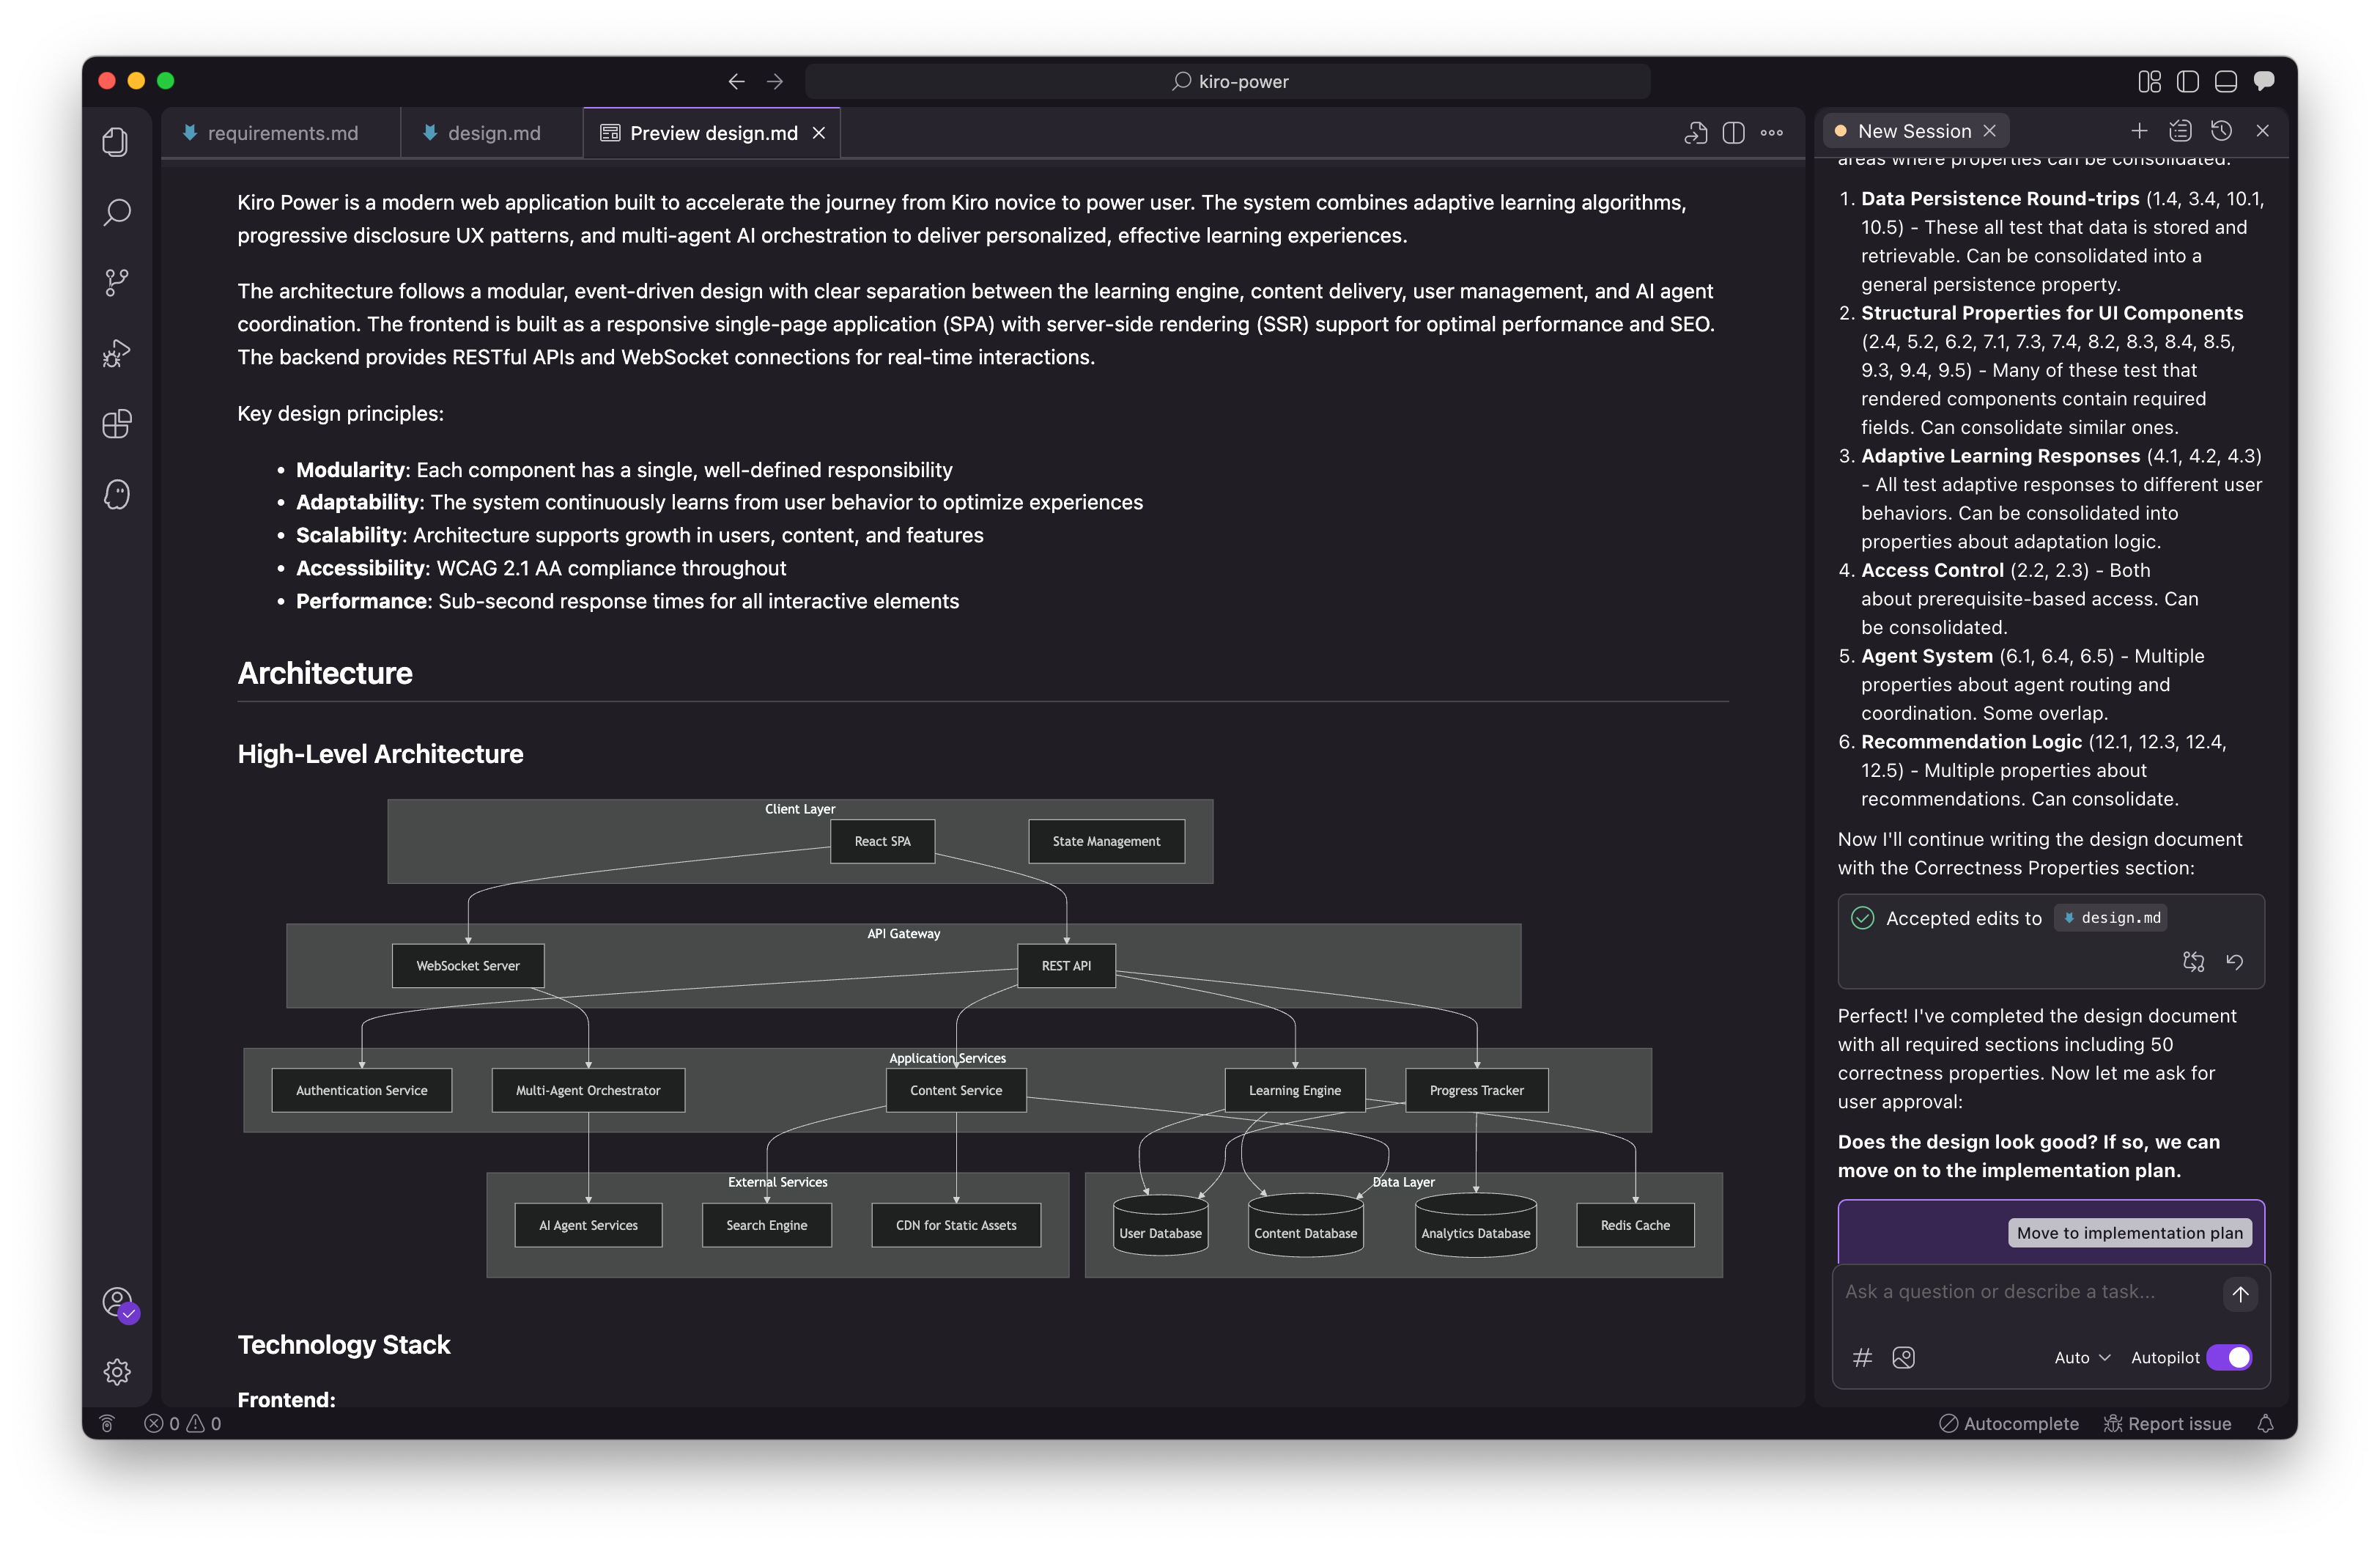
Next I intuitively clicked on “Move to design phase”. The design document is way more detailed as I expected. It has everything I imagine a software engineer will look for before writing their first line of code including a high-level architecture diagram.
It also includes technology stack definition with frontend, backend, AI/ML, infrastructure layers specified.
There is a detailed section on Components and Interfaces indicating Component Based Design approach. Then there is a section on Data Model with various interfaces defined in code.
Then I note an interesting section called Correctness Properties. It is defined in the document as follows:
A property is a characteristic or behavior that should hold true across all valid executions of a system—essentially, a formal statement about what the system should do. Properties serve as the bridge between human-readable specifications and machine-verifiable correctness guarantees.
Pretty awesome that Kiro generates this as well and comprehensively too with 50 properties validating each requirement’s acceptance criteria!
Tasks Definition
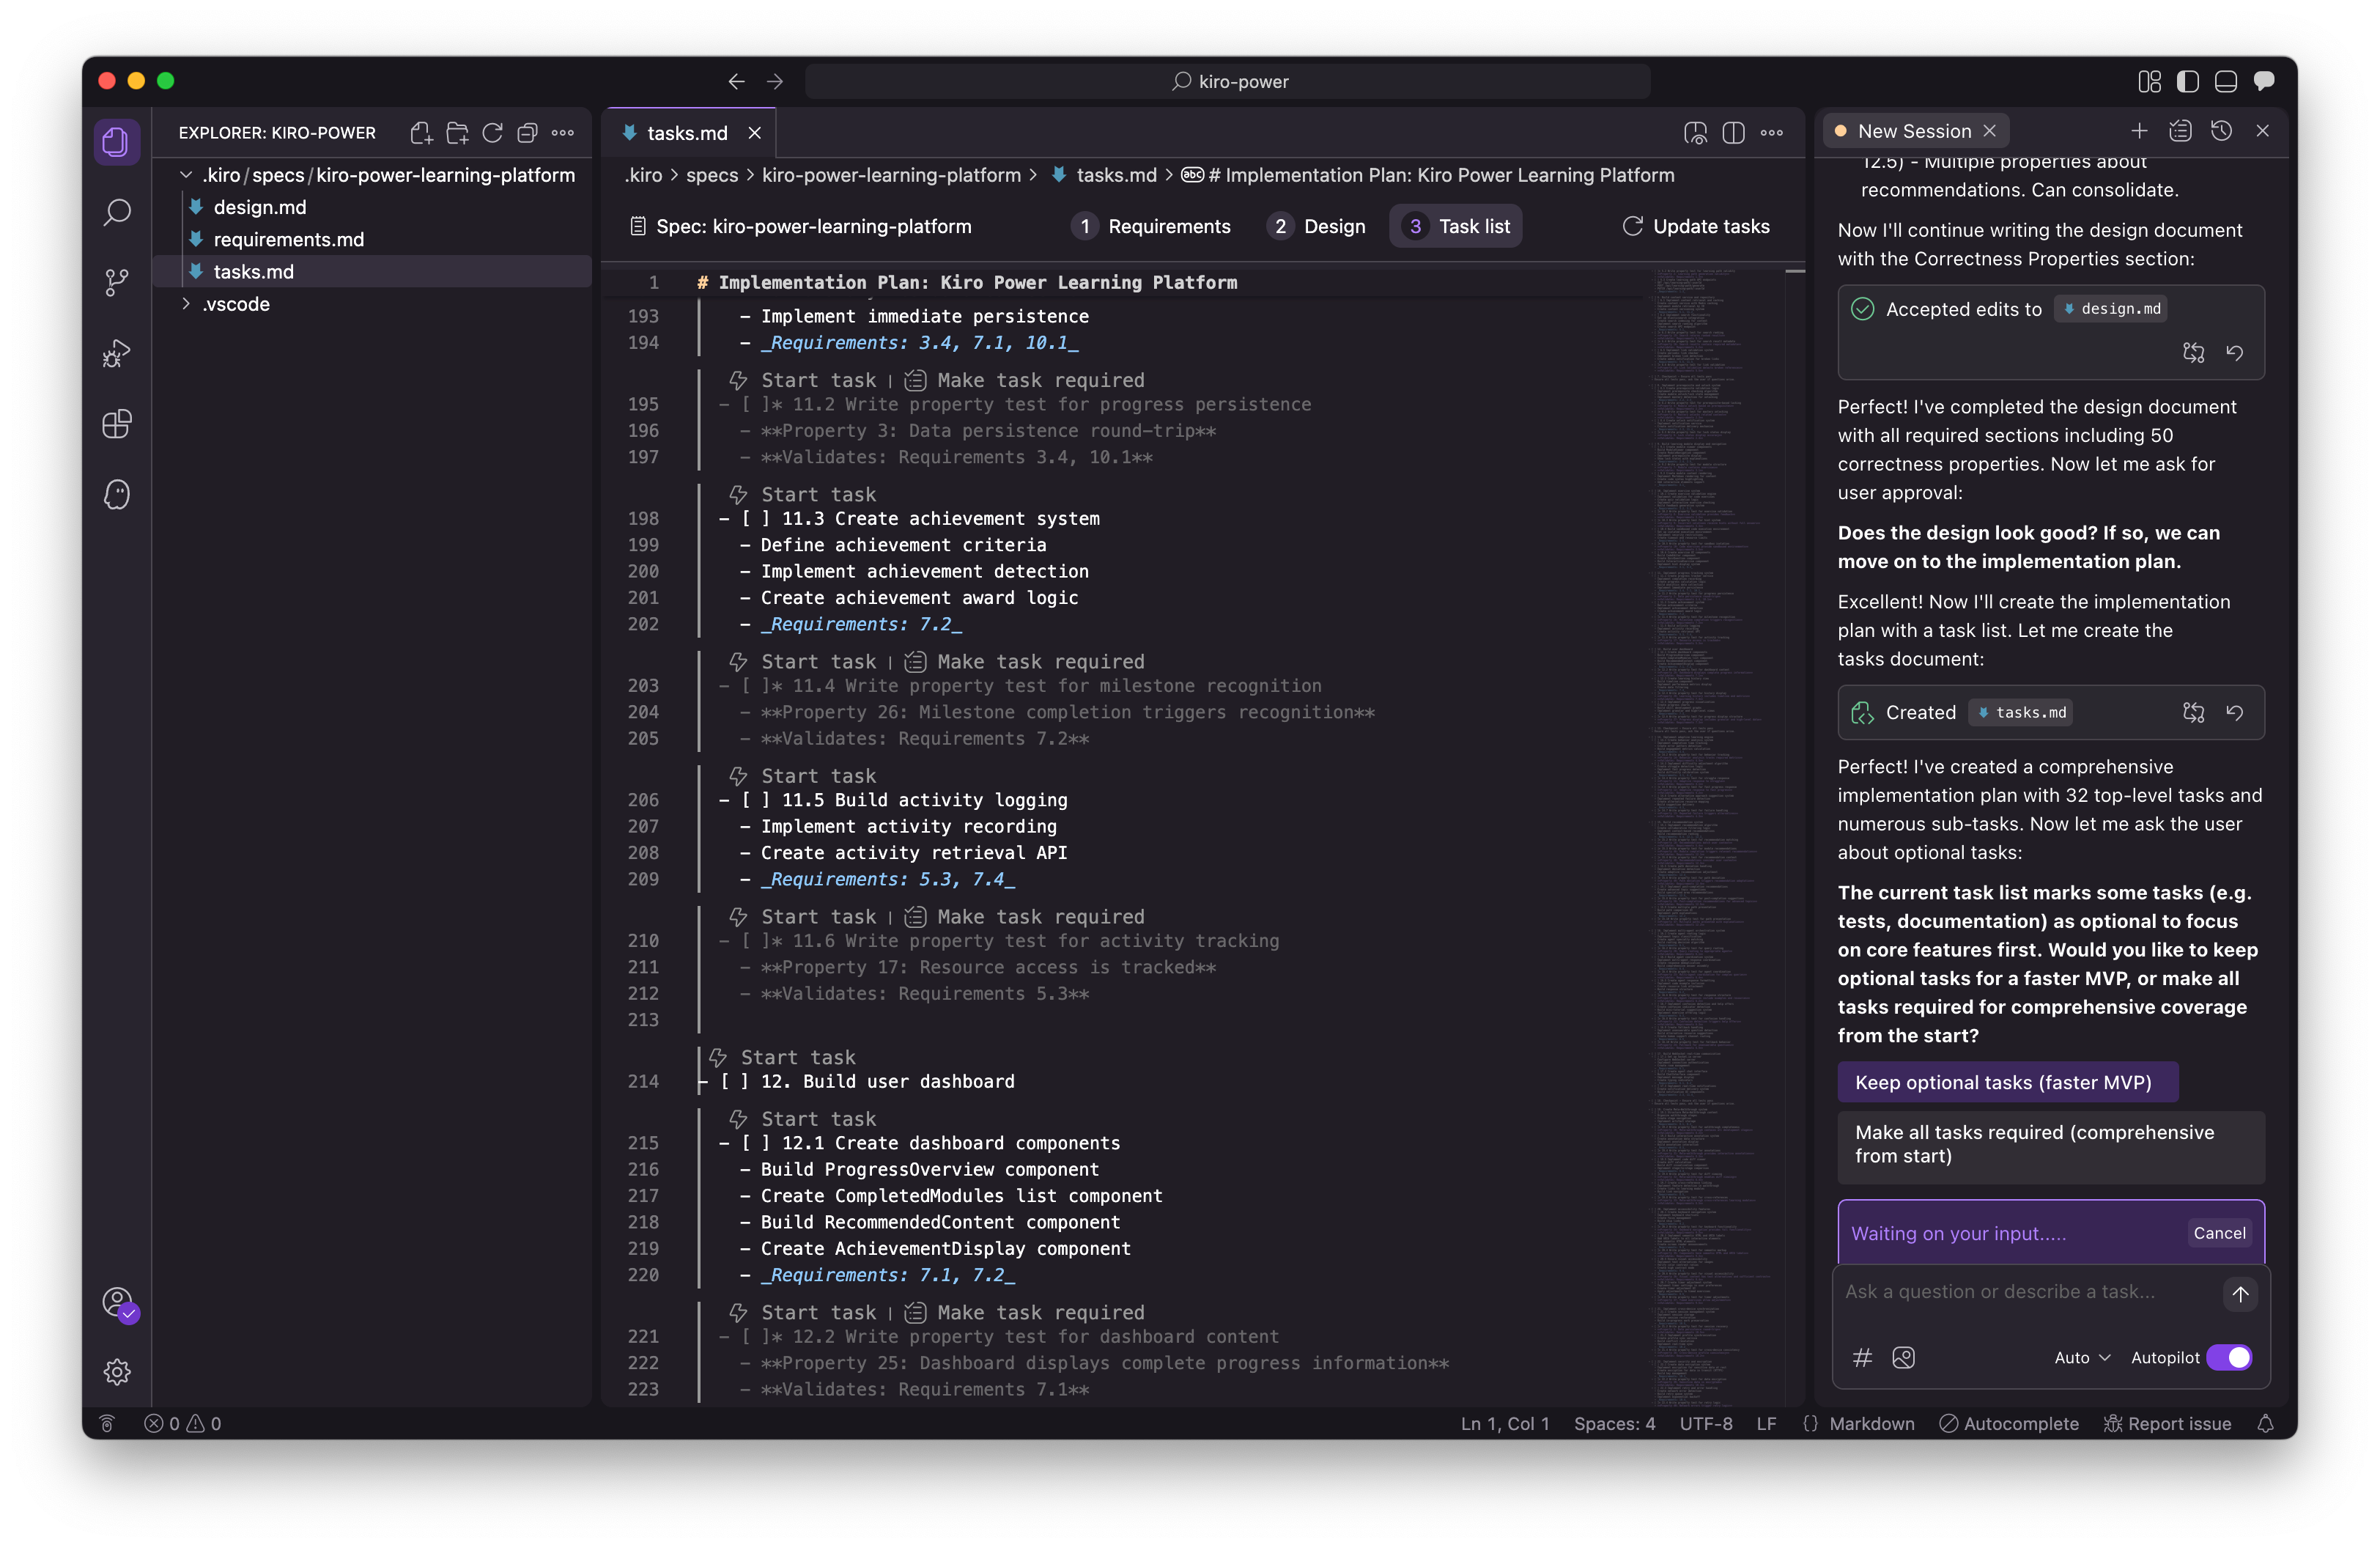
Next I move to implementation plan. I loved the outcome of this step. I have tried many code generation tools from frontier labs to top AI startups. Nothing gets to this level of structured, traceable outcome this early in the project, like what Kiro is able to do with the Tasks list.
It is able to structure each requirement implementation into a set of tasks, automatically traces tasks back to origin requirements, recommends which tasks should be part of MVP on its own, and so on. Love it. All I need to do now is review the tasks and take a quick decision on staying the MVP course or try to build it all in one go. I obviously want to start small first, then iterate, so choose the MVP option.
The other neat feature I noted that is unique to Kiro is the document generated is not a “static” markdown but it has these little interactive components embedded in-place within the context of the document. Like the “Start task - lightening link”.
Here is the closing response from Kiro which summarizes the awesome work already complete with minimal human intervention.
Perfect! The spec workflow is now complete. I’ve successfully created:
Requirements Document - 12 comprehensive requirements with 60+ EARS-compliant acceptance criteria covering all aspects of the Kiro Power learning platform
Design Document - Complete architecture with:
High-level system architecture and technology stack
6 core components with detailed interfaces
Comprehensive data models
50 correctness properties mapped to requirements
Error handling strategy
Testing strategy (unit tests and property-based tests)
Deployment and monitoring plans
Implementation Plan - 32 top-level tasks with detailed sub-tasks:
Core implementation tasks are required
Testing tasks are marked as optional (*) for faster MVP
Each task references specific requirements
Property-based tests are tagged with their corresponding properties
Includes checkpoints to ensure quality throughout development
The spec is ready for implementation! You can now start executing tasks by opening the tasks.md file and clicking “Start task” next to any task item. The optional test tasks can be implemented later if needed, allowing you to focus on building the core functionality first.
I do exactly as Kiro recommends and open the tasks.md and click “Start task” on the very first task to see the magic happen!
Task Execution
Here is the first task executing. Kiro only asks me for permission when it is installing something in my project folder. Loving the clean, intuitive design, well used iconography, makes everything so neat and human parsable.
This is also the first time I notice all sections of the Kiro IDE come alive in concert, including explorer panel on left with new files added to the project structure, the central panel showing current task executing, terminal at bottom showing commands being executed, and agentic chat panel on right.
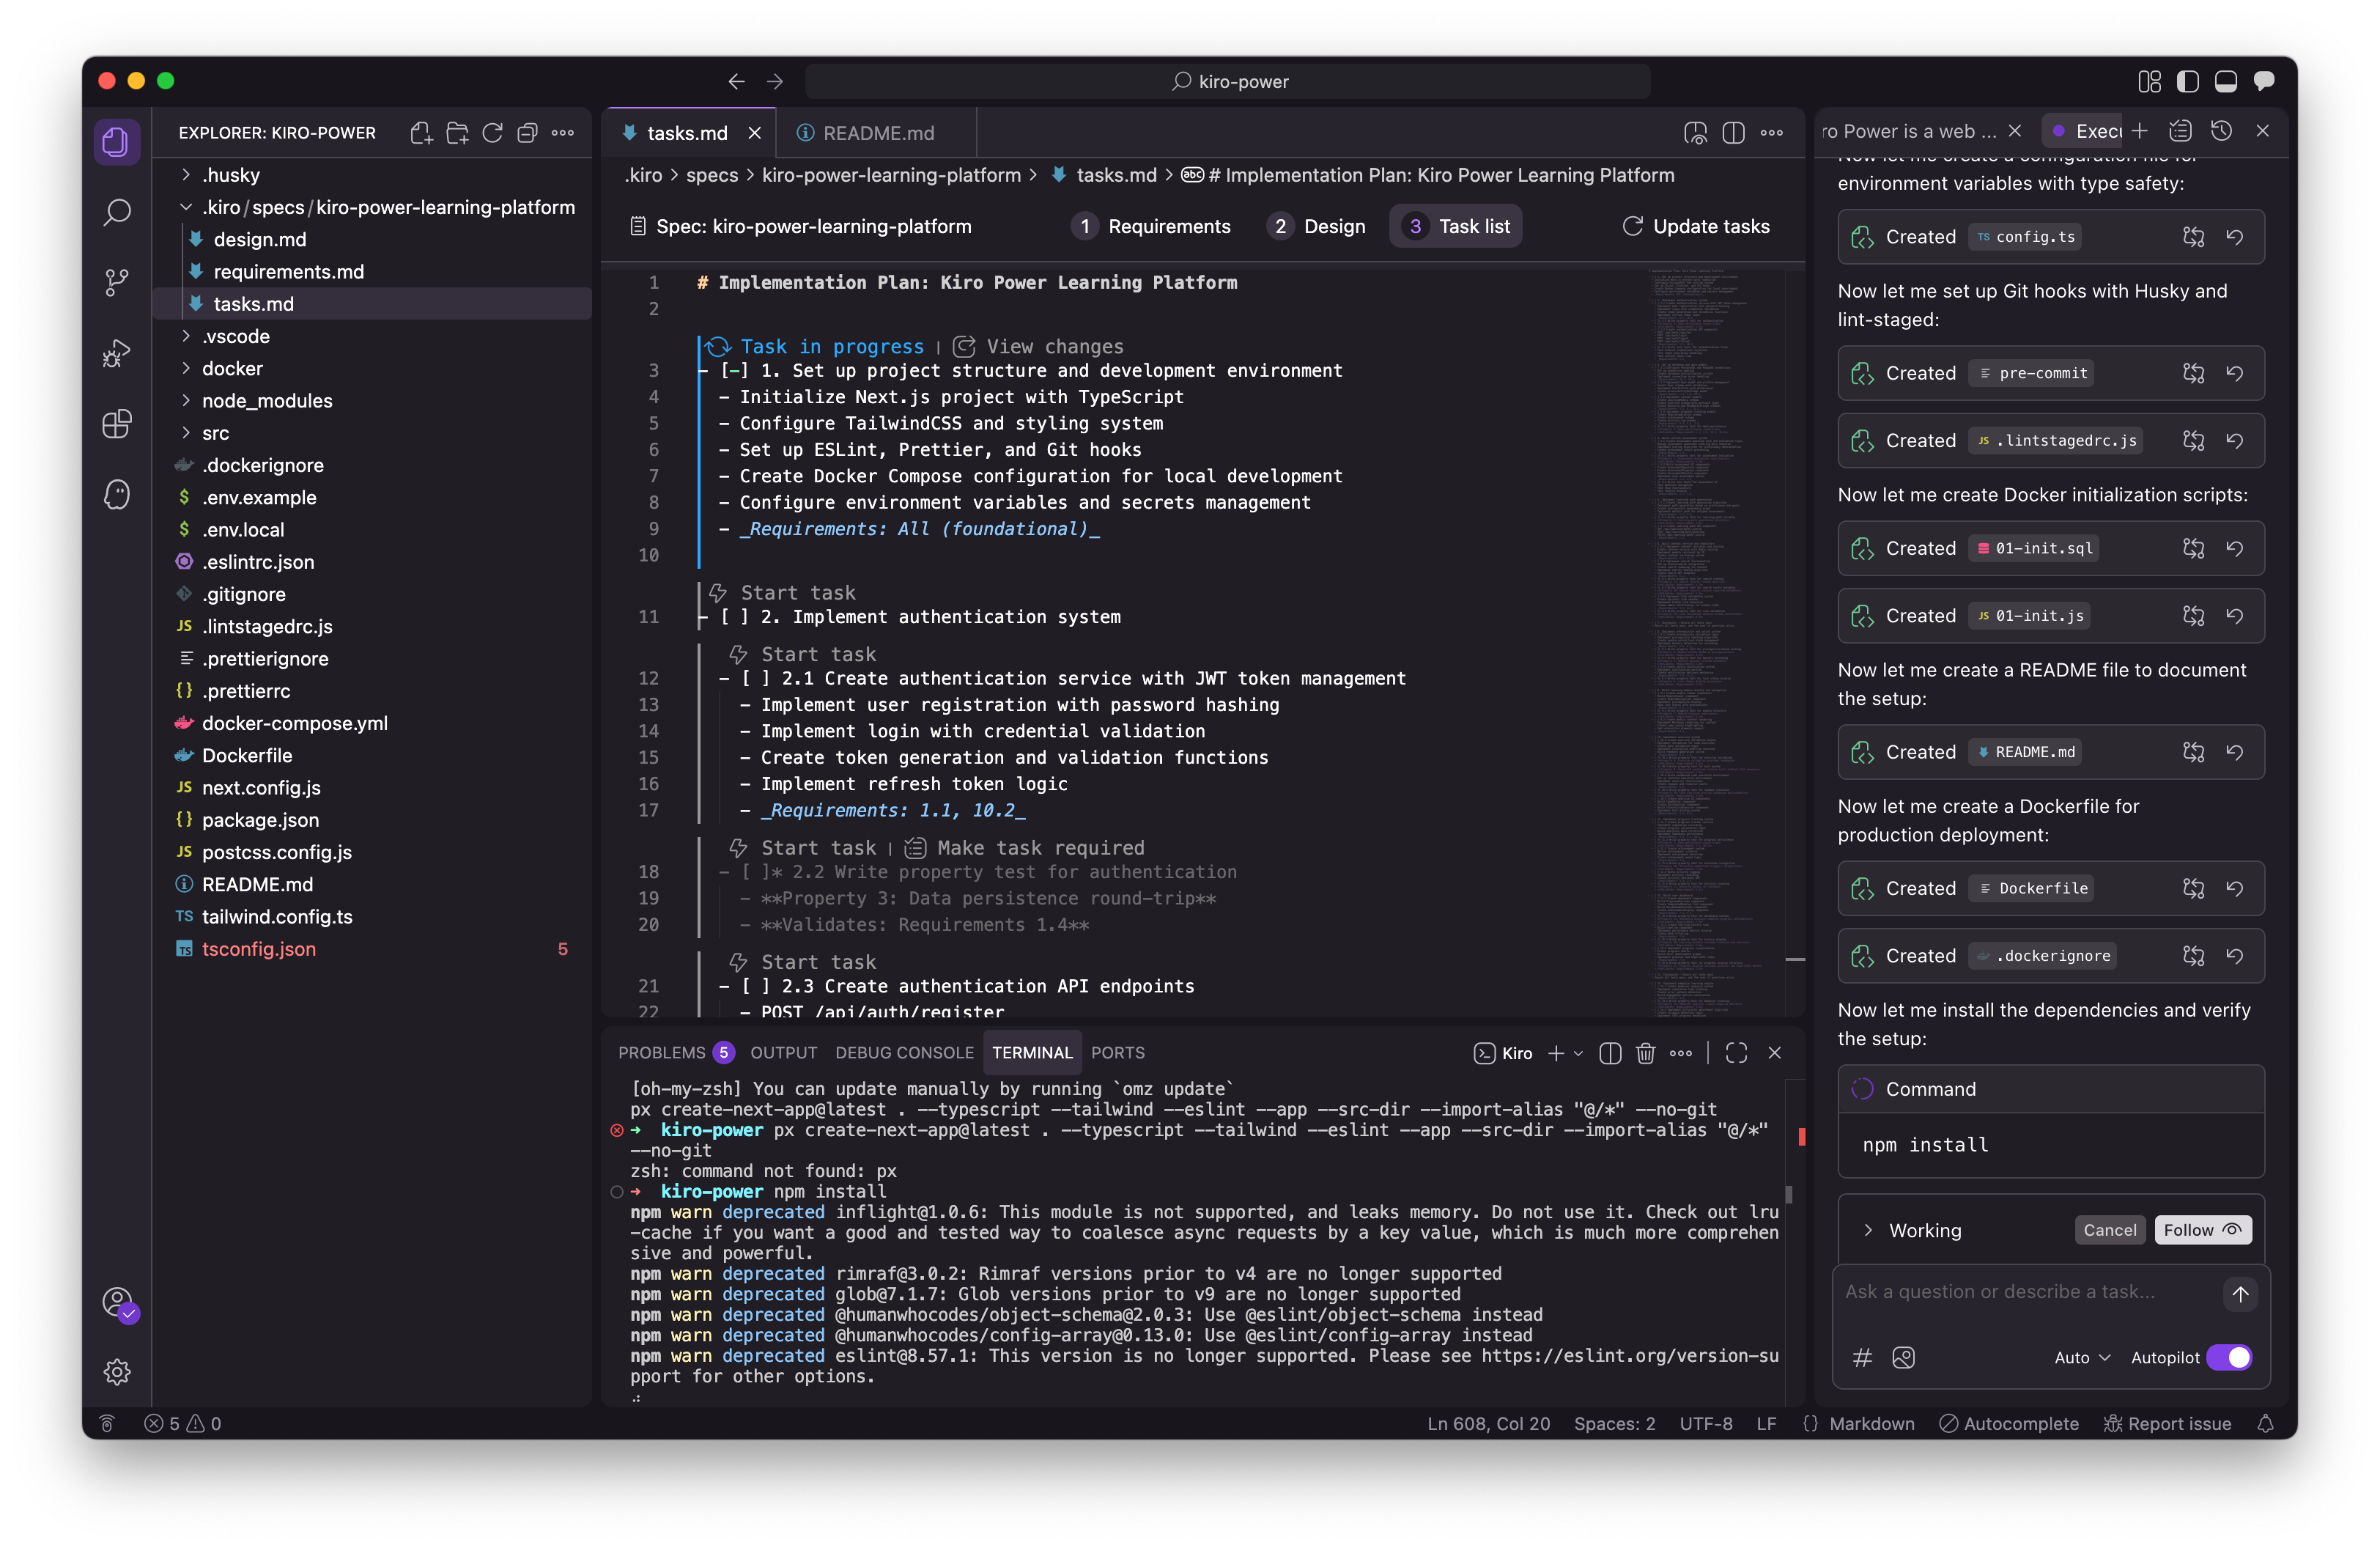
I like the user permission interface which progressively asks me to make Kiro more autonomous or less (I have more control on command execution). I can see all the settings in one place.
And as I write this section first code generation task by Kiro is complete! I get a nice summary on chat panel of what was completed. The tasks.md gets auto-updated noting project progress and I can visually verify the project structure has several new files added.
I also notice the nice “Revert” button in case I am not happy with the changes it seems Kiro has checkpoints saved automatically for me to revert to prior state of the project.

Kiro instructs me on next step and I follow.
The project is now ready for implementing the authentication system (Task 2). All dependencies are installed, the development environment is configured, and the foundational structure is in place according to the requirements.
This is the first release where I see the automatically generated unit tests running in the terminal.
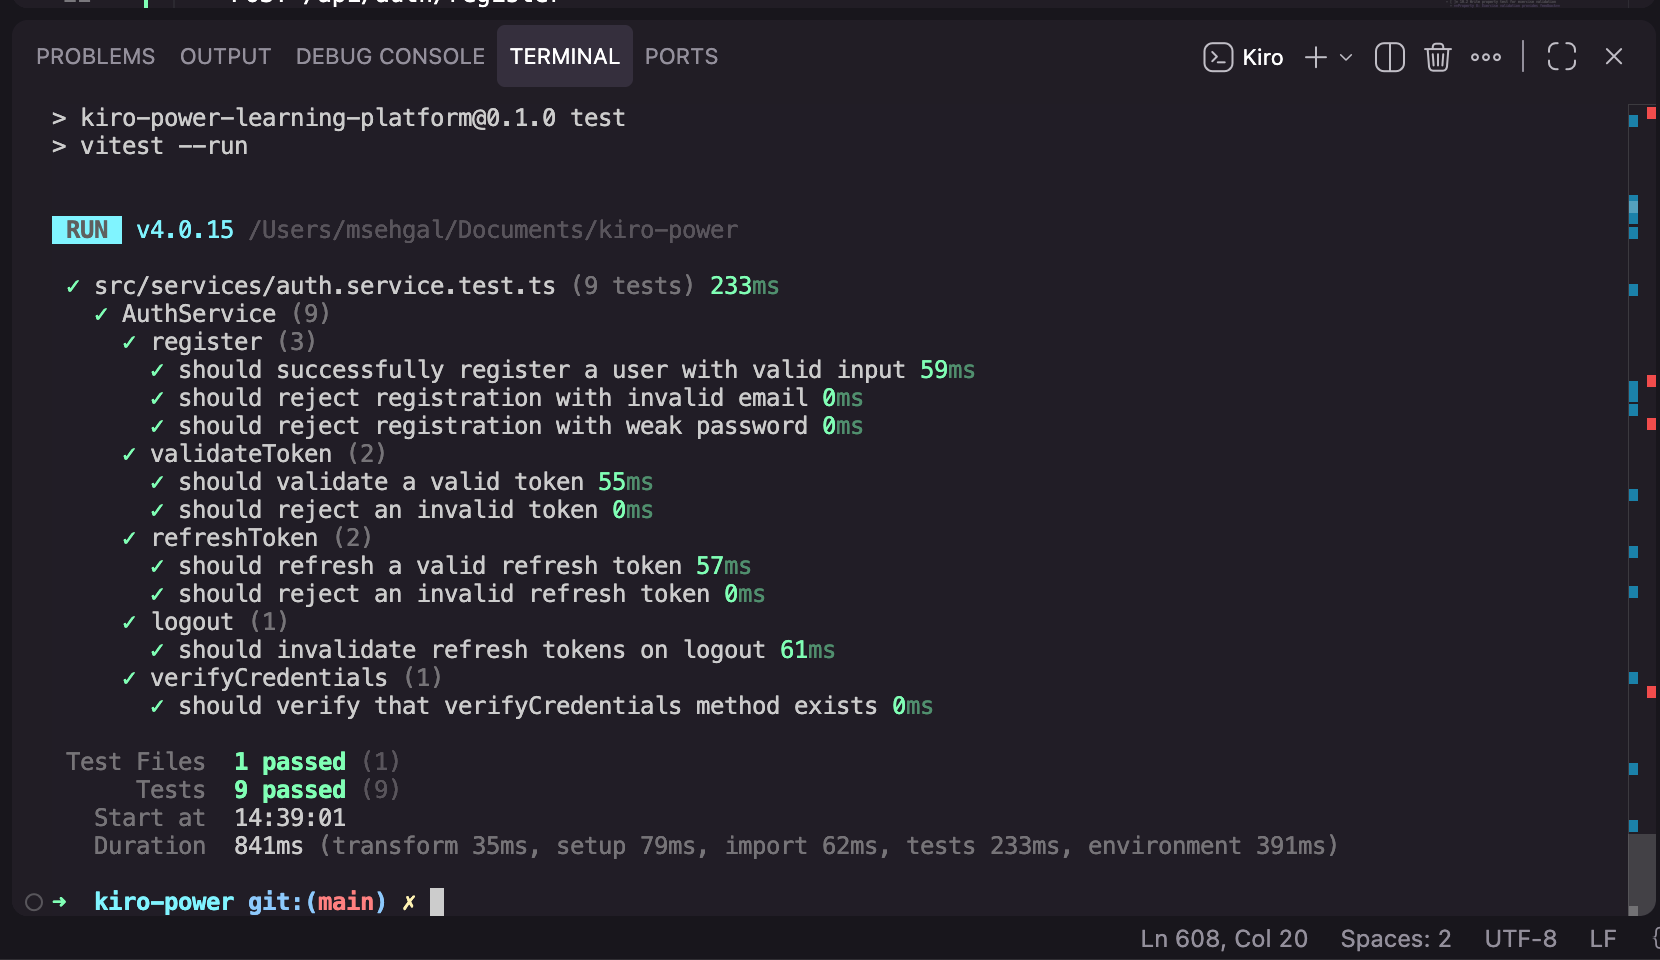
Task #2 build the authentication system. I move on to click Task #3 to set up the database and data models. Then on to Task #4 to build the initial assessment system. This is the first time I see failing tests on console and eslint testing which indicates this release will have the initial UI to human evaluate. Kiro handles the error fixes on its own and continues to chug along.
Finally as Kiro completed Task #4 - I asked if it is ready for me to see the UX (my first prompt in the chat panel) and Kiro spawned another terminal to run the development server and start the web app on localhost.
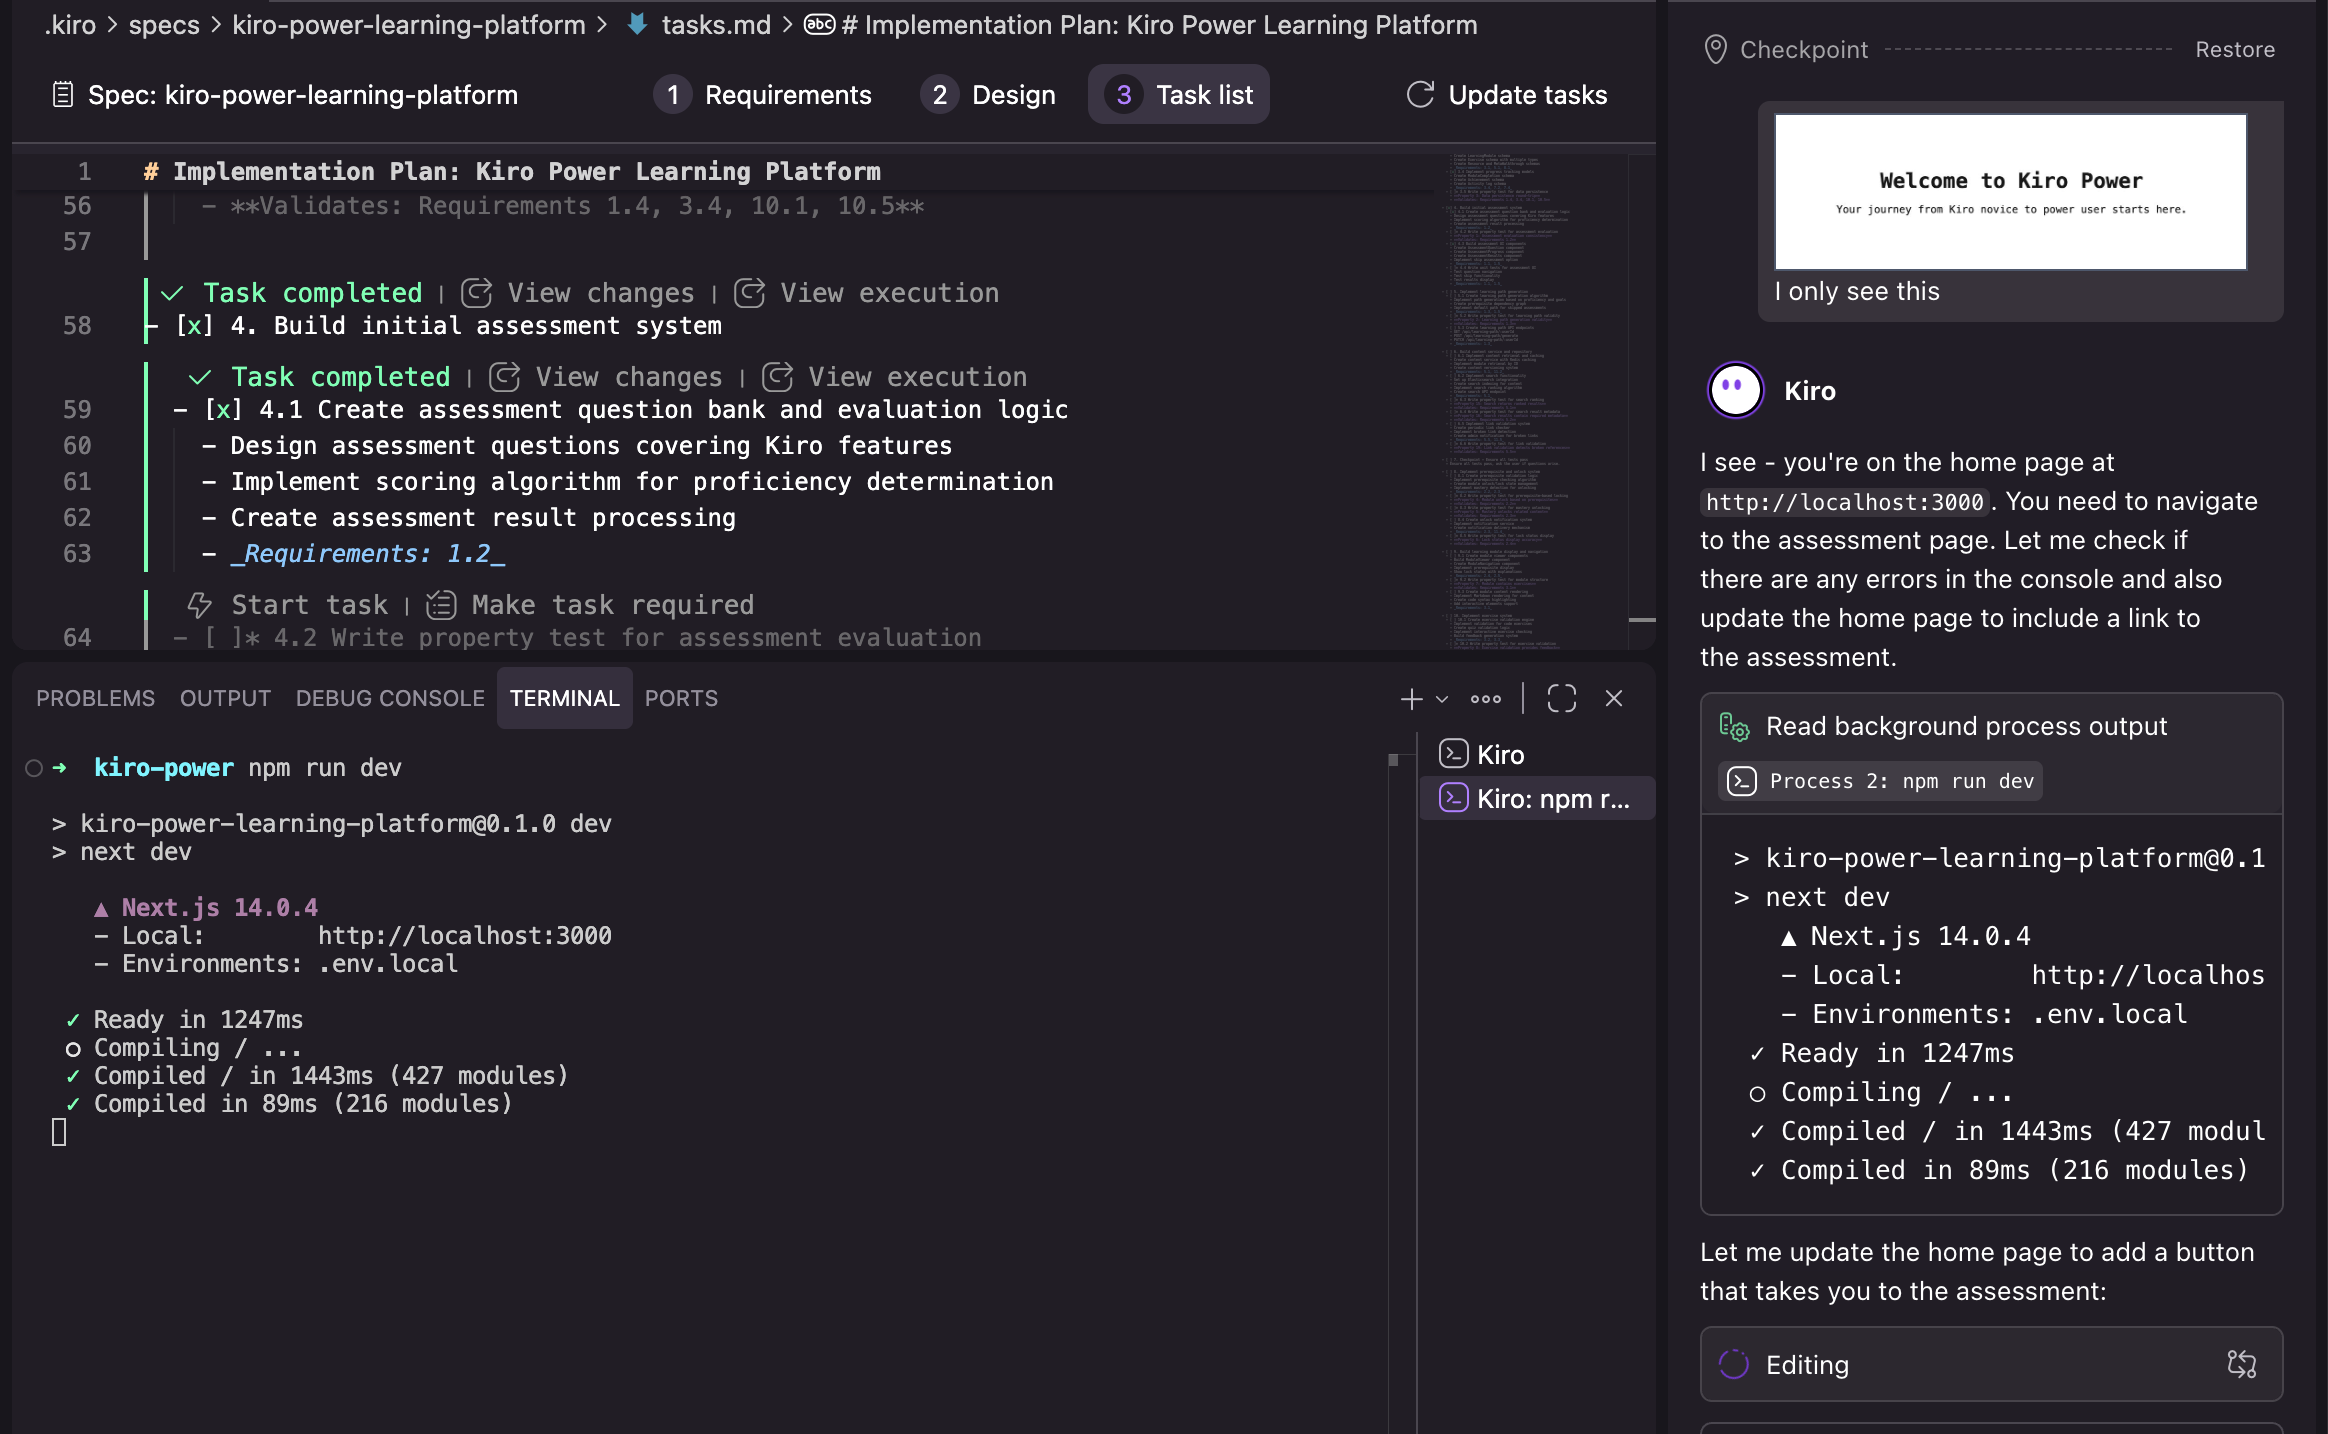
I encountered my first bug where the screen just showed the intro message and no way to interact with the app. I captured and pasted the screenshot into Kiro and it fixed the bug in less than a minute. Single shot!
Next I clicked again on localhost link and wow! the app worked smoothly.
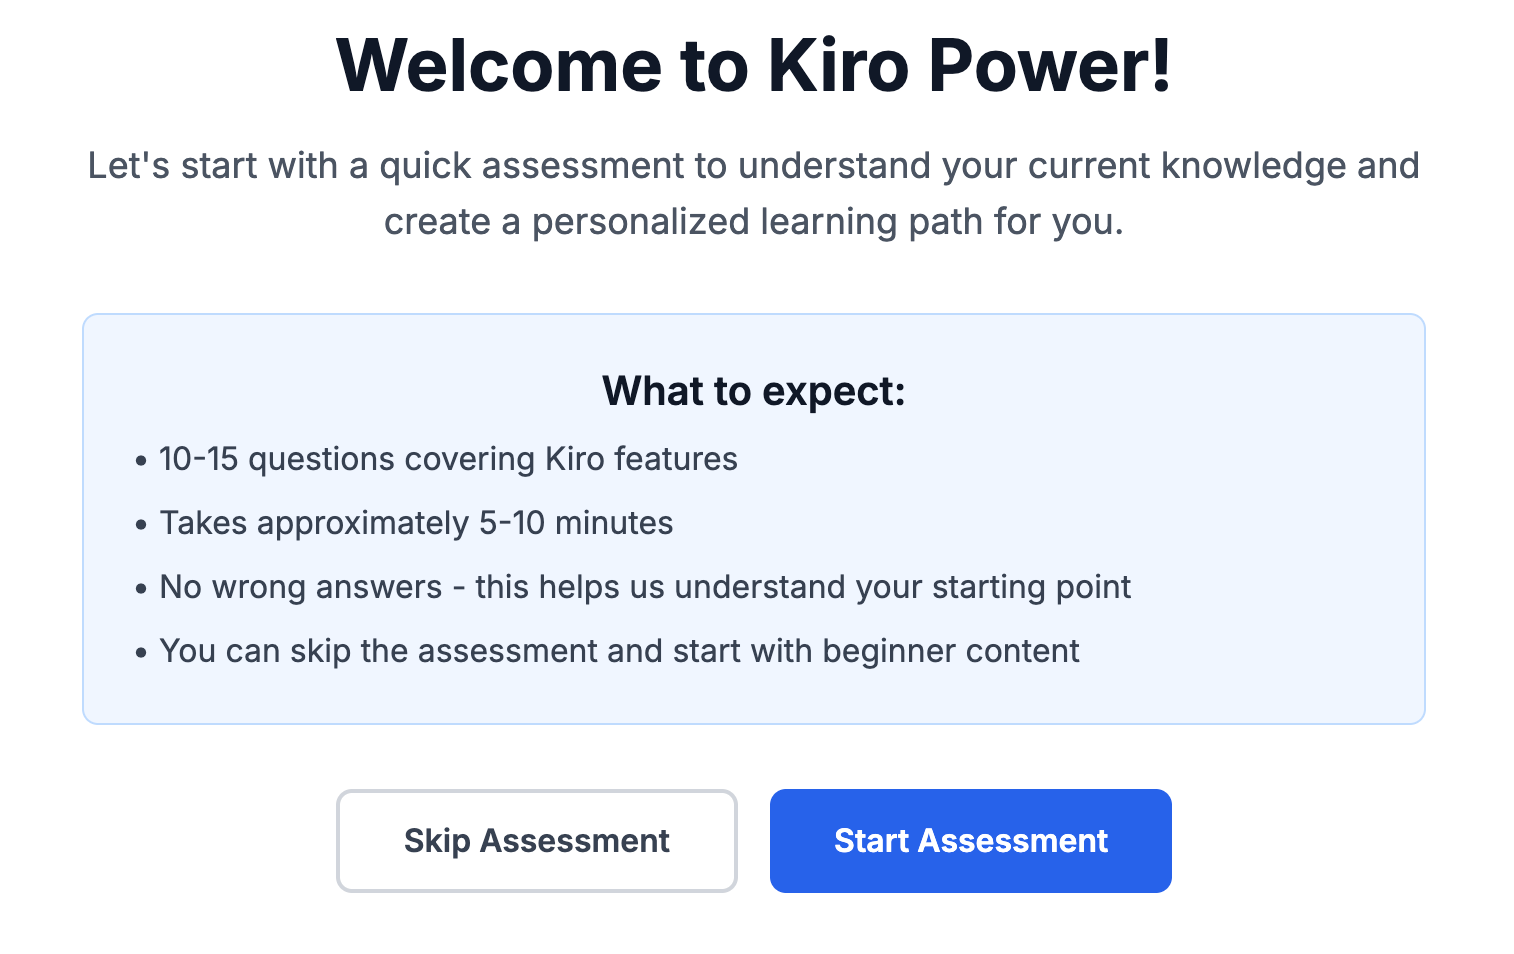
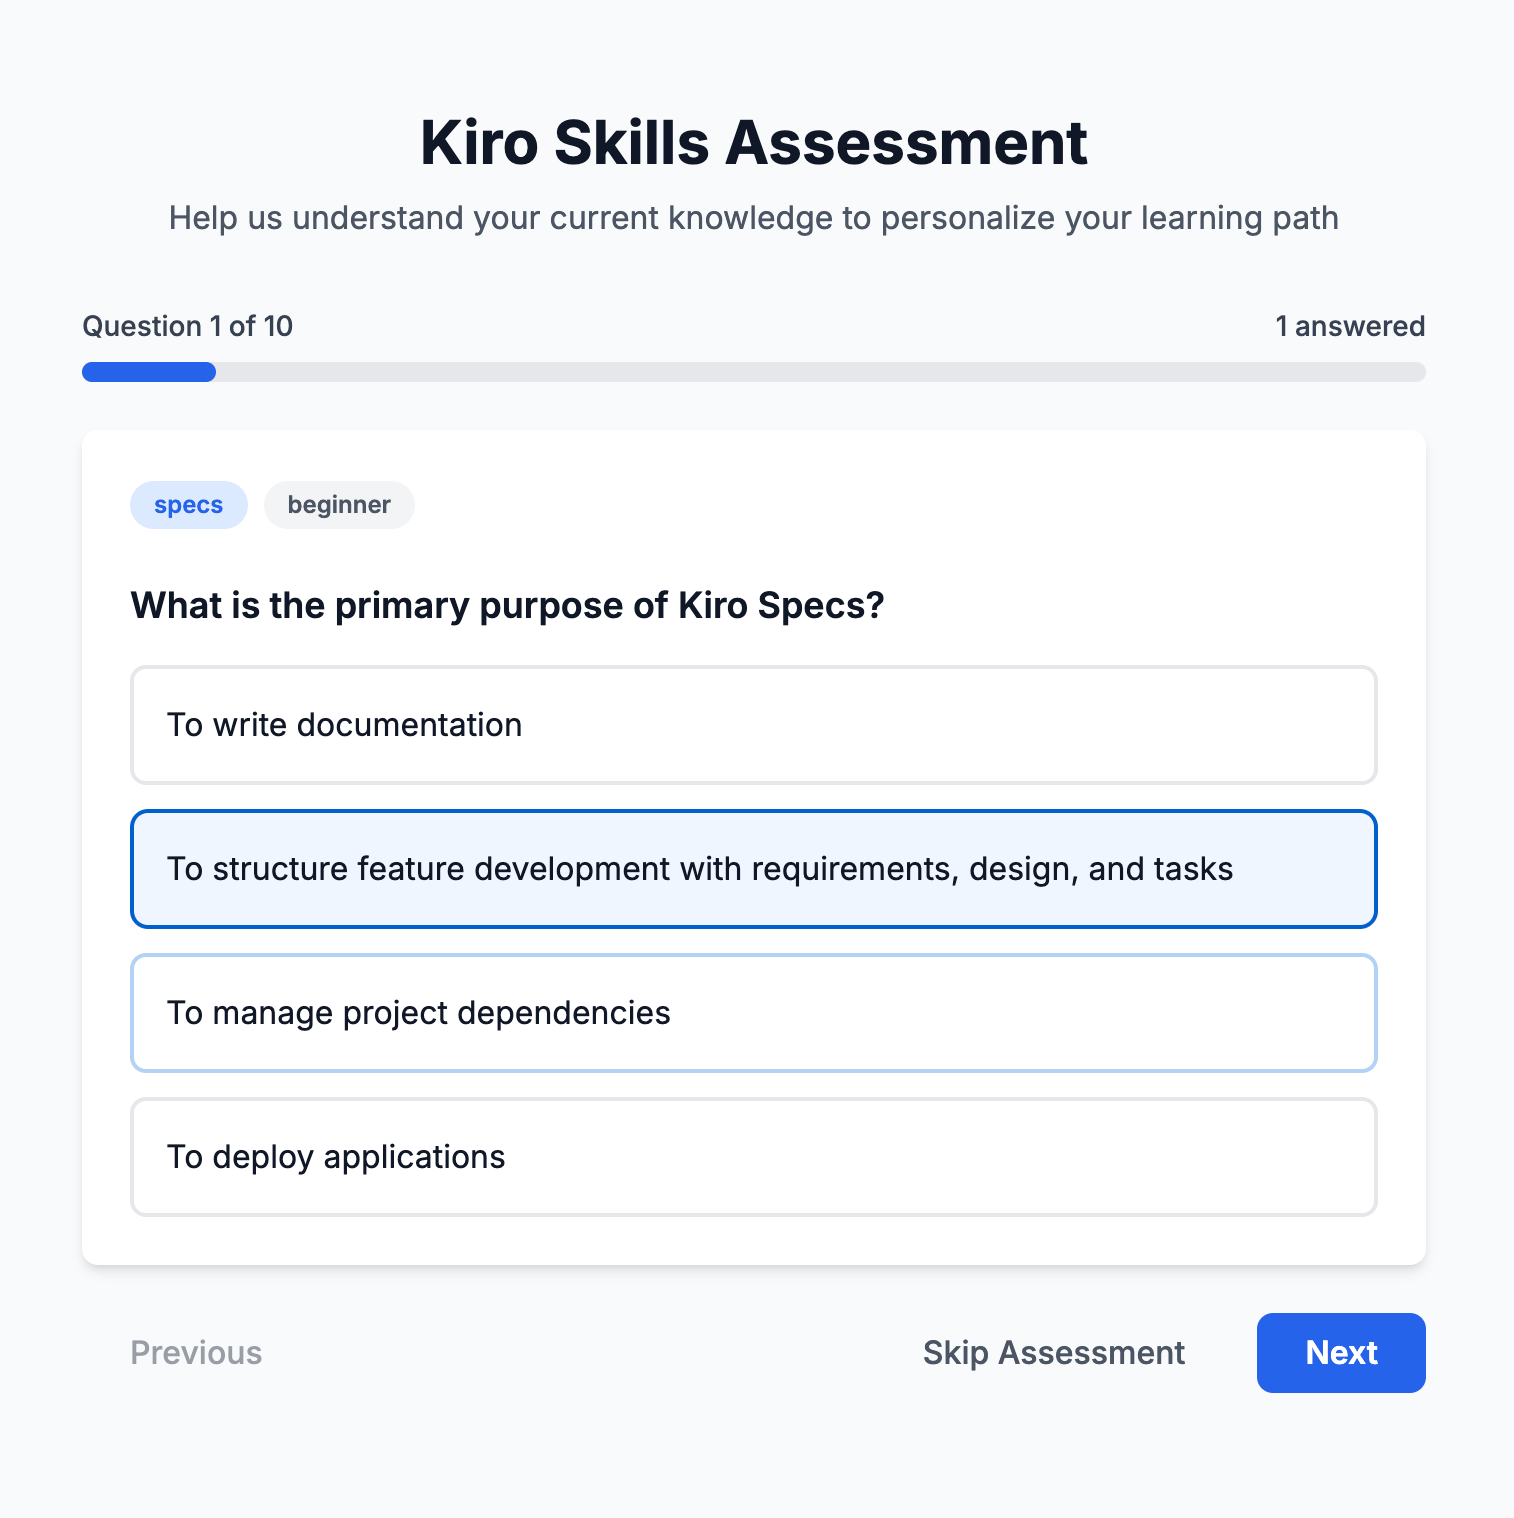
I could run the assessment test, animating smoothly, moving through 10 tests. I answered randomly to check the assessment.
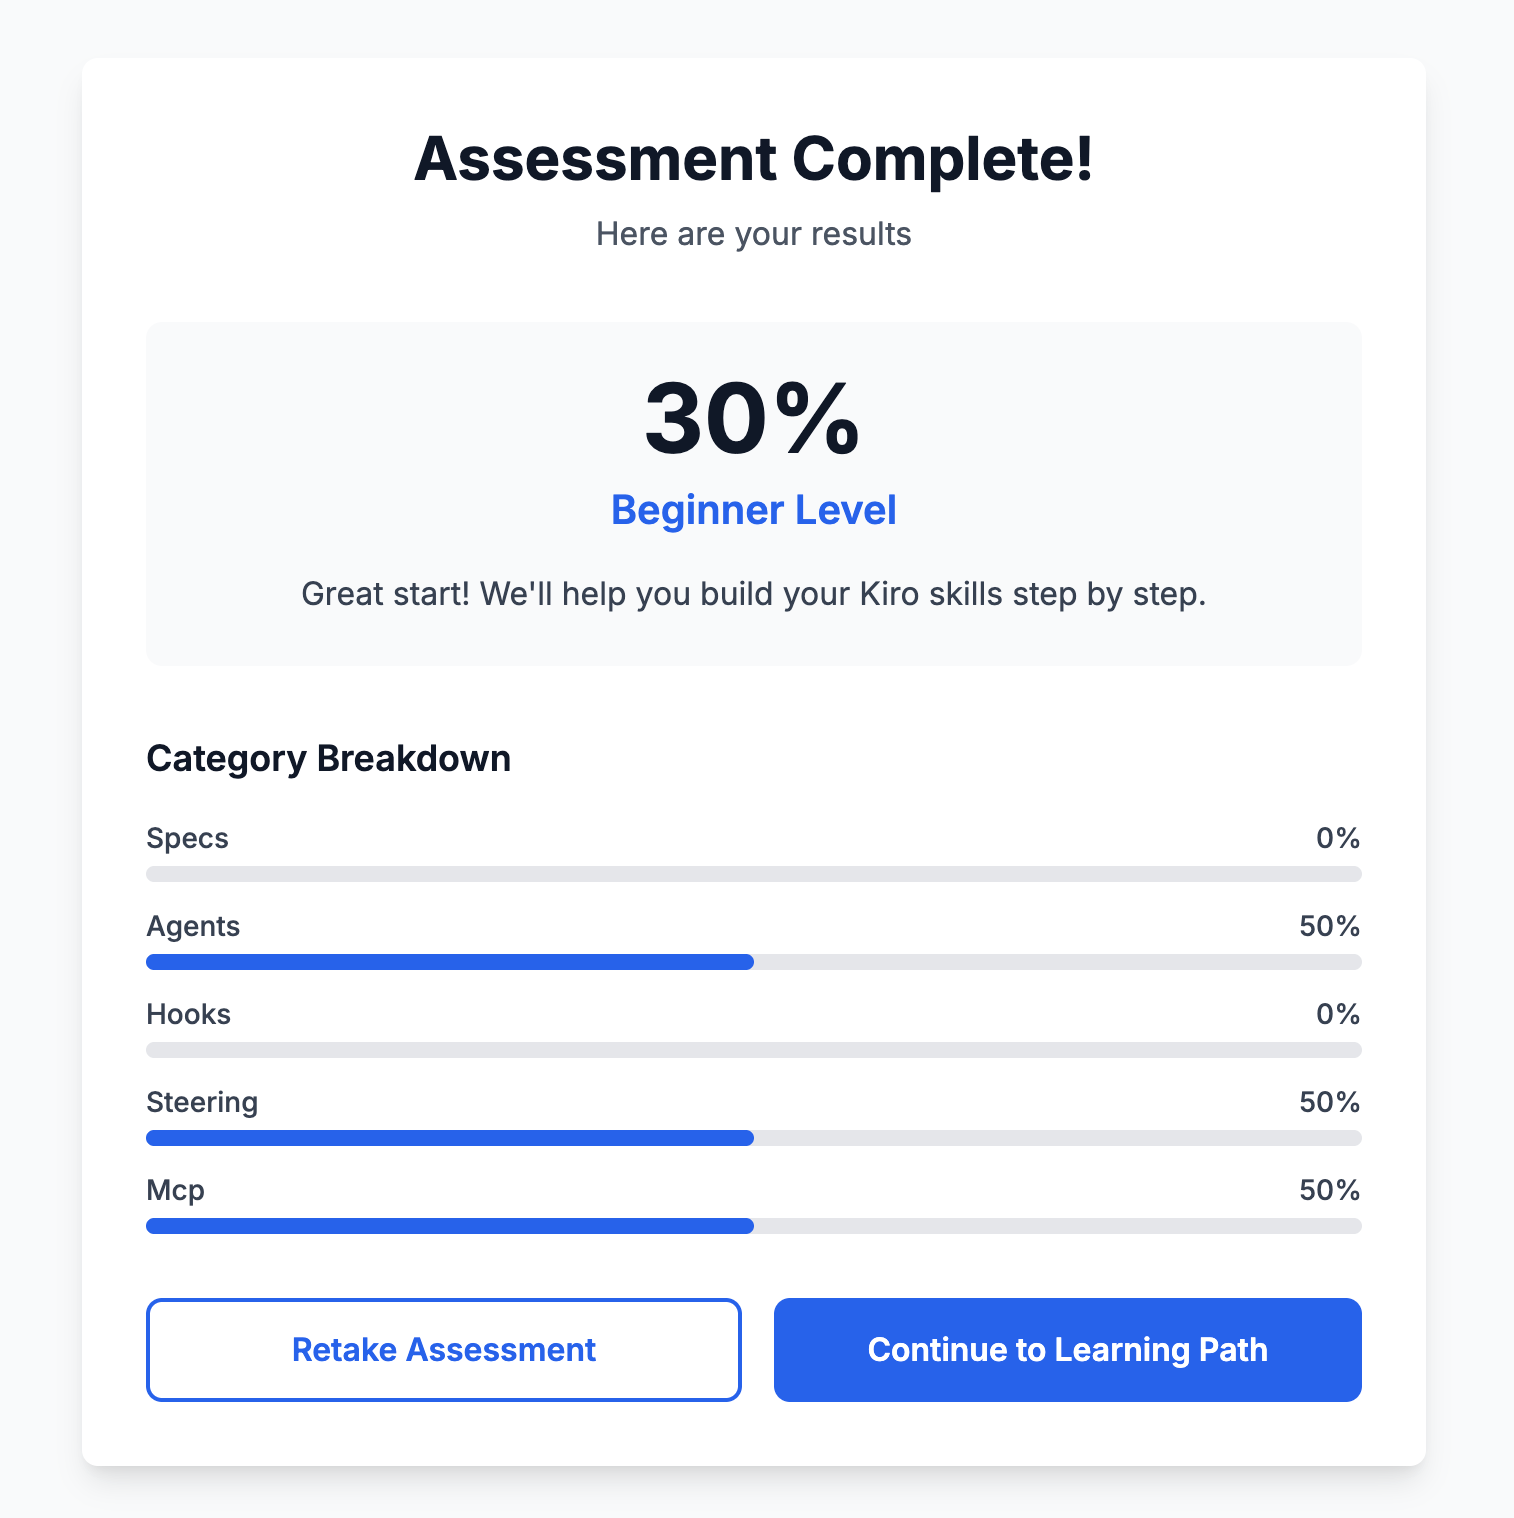
And here is how the results looked. Not happy with my own performance, but very happy to see a full user journey just within 4 tasks being executed by Kiro.
What is amazing about this app at this stage in code generation is how Kiro got here just with a three sentence product vision level prompt!
I am excited to continue building the app and report the progress in the next article in this series. Until then please enjoy some AWS re:invent 2025 content right here. Links to YouTube on a growing Playlist of videos as the event unfolds.
Hey Manav, excellent overview of Kiro! I recently shifted from Q CLI to Kiro and love the spec-driven design. Thanks for the post!